“ Elins Nails: glitter
Showing posts with label glitter. Show all posts

05 July, 2014

Patriotic 4th of July Nails

Over there in the big country across the Atlantic Ocean the holiday 4th Of July is being celebrated. Although I'm not living there anymore I just had to join in on these celebrations, and it's kinda started to become a tradition for me to celebrate this holiday with some great nail art. So why break it now? I'm still hoping I will get a chance to celebrate 4th of July right there in America, hopefully in Texas, but this will have to do until that day when I actually will do so. 

I was in a kinda glittery mood when I chose out the colors for this design, so its a nail art full of glitter! Since glitter nail polish isn't always super compact I started of with a layer of white nail polish to have a base for all the glitter that is in this. 

Patriotic 4th of July Nails by Elins Nails.

The design is pretty easy, not much tools where used for this patriotic Nail Art. Everything but the stripes and dots are made with the brush in the nail polish. I guess you can even say that the stripes was made with that too because I was using a striping nail polish - very thin brush in the nail polish. 

For this I did 3 nails with both blue, red, stripes and dots. The stars had to become dots because I'm really not that good to make that small stars. The third one that you can't see on the picture is obviously the thumb. The two other nails I did concentrate on one of the colors. Since the blue polish I was using was more glitter then color, compared to the red one, I did a glitter gradient. Then with the smallest dotting tool I have I added dots over it. With the red one I did the whole nail and the added stripes. 

Patriotic 4th of July Nail Art by Elins Nails

I hope you liked the Patriotic 4th Of July Nails! For everyone other there that is celebrating it today, what have been your plans for the days? I'm pretty curious to know, so if anyone got something exciting to share please leave a comment for me!

23 August, 2013

Galaxy Nail Art - My nails are out of this world

Today I thought I would share this galaxy Nail Art which I made. I'm pretty satisfied with these nails, except for the fact that the glitter I put on top of it was to compact. Which I didn't really know before. But other then that its a pretty easy design all you need is some cool nailpolishes and a make up sponge and then you are good to go.


Galaxy nails by Elins Nails


To do this design I started with two layers of a dark blue with a little bit of shimmer in it. Then with a make up sponge I put on a little pink, a light blue and then at last purple. Then to top it all of and give it that 'Out of this world' feeling I added some holographic topcoat. 


Then with a white striping nailpolish I made some stars on and then made some smaller stars with a dotting tool. And then I did that thing I regret the most, I wanted more glitter so I grabbed this new glitter striping nailpolish and made some random things on the nail. Lucky me it didn't look so bad in real. 

To end it all I added a layer of topcoat, to just put the finish touch on it. Making it all smooth and shiny.


 The nailpolishes I used for this design is these - 


Base coat - Isadora - Second Nail
Dark Blue - China Glaze - Up All Night
Pink - Essie - Cute As A Button
Light Blue - China Glaze - Flyin' High
Purple - Mavala - Samarkand
White - Kiss Nail Art
Glitter - Kiss Nail Art

And then I realized I forgot the top coats I used -

Holographic - Ciaté - Halo
Top Coat - Seche Vite 


Please leave a comment saying what you think about this design, thanks.

12 August, 2013

Ciaté Metallic Foil Nails

For these designs I used a method I haven't used before but it was pretty easy and I like the results of it.

Metallic Foil Nails by Elins Nails

For this I used the 'Very Colourfoil Manicure' kit from Ciaté.

Ciaté - Very Colourfoil Manicure

Foil Manicure supplies by Elins Nails

The kit includes a nail polish - Kiss Chase, Foil Fix (glue) and small pieces of what I guess we should call the Foil. 


Foil Manicure by Elins Nails


For this you start with base coat as normally to protect your nails. Then you put two layers of the nail polish which was included in the kit. When its completely dry you put some foil fix on some random spots on the nails and then put the foil paper on, just press it first and pull it off quickly. Then you just repeat putting on more foil until you are completely satisfied. Then finish with a coat of top coat. Super easy!


Foil Manicure by Elins Nails

It's an easy method and it gives an great results without having to have loads of experience and time to make it super carefully. I think this is a great method where you can be a little sloppy but will still get a great design. 


02 April, 2013

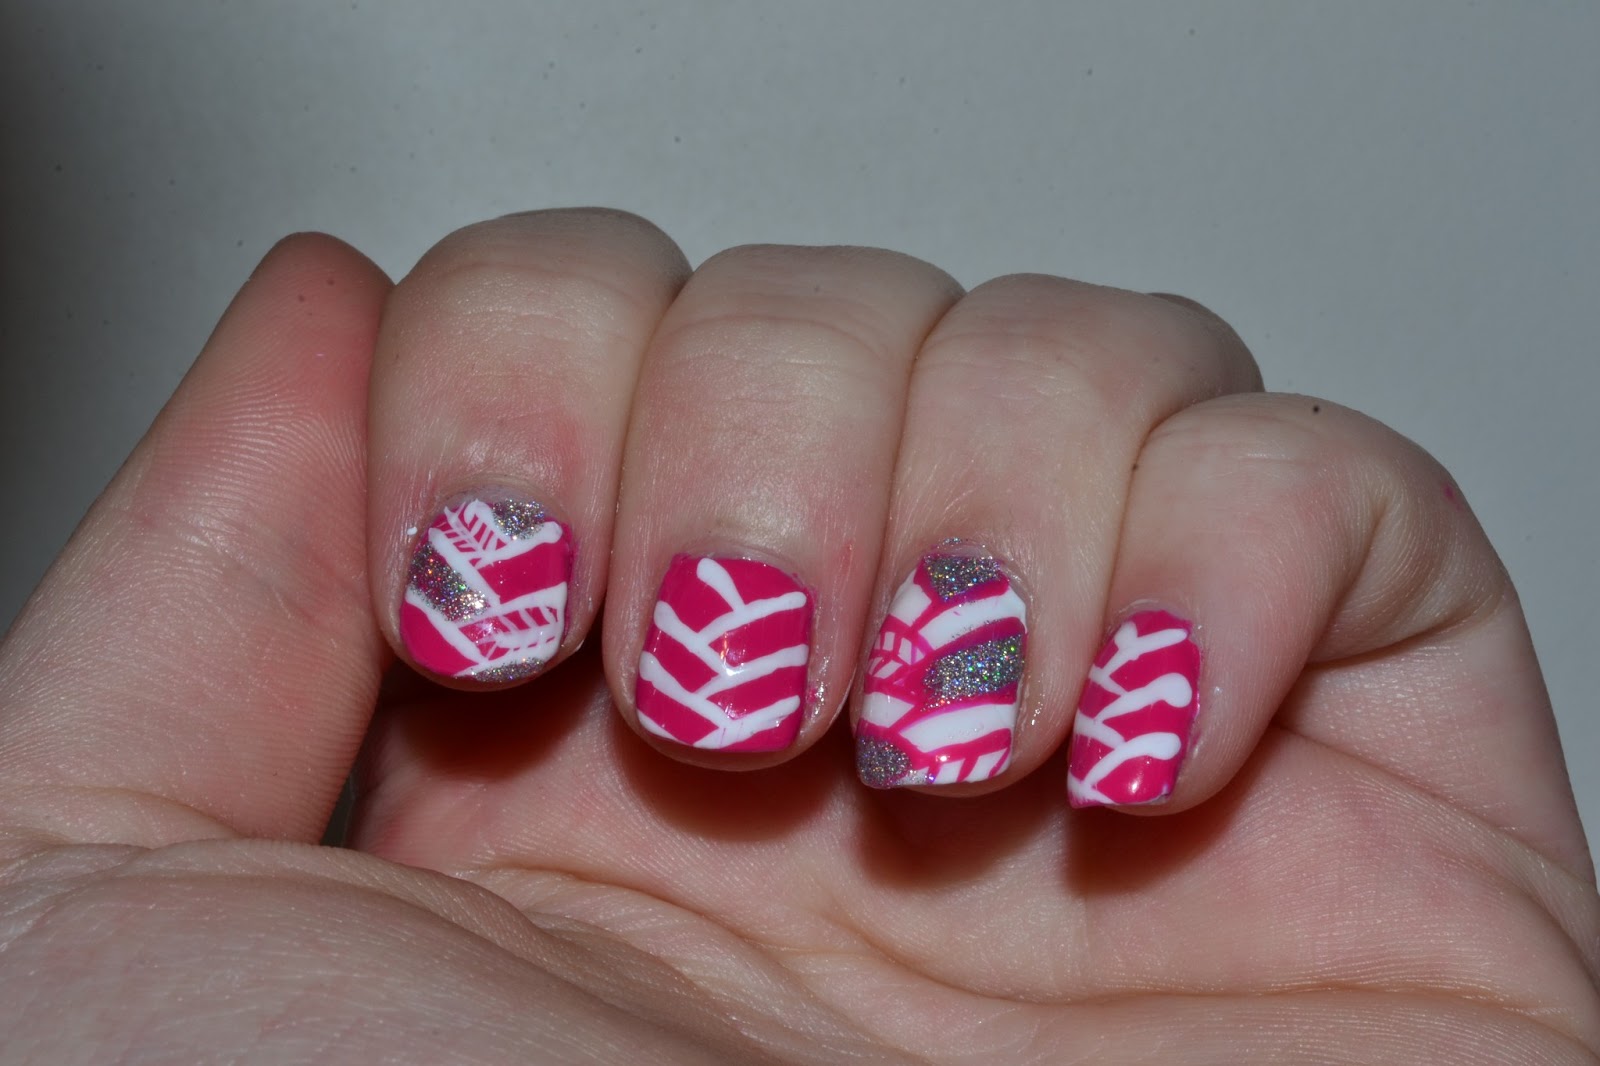
Herringbone Nails

I hope everyone of you had a great easter. I had a great one, except I ended up with the flu which isn't that much fun.

For this design I started with picking up a nail polish which I knew I wanted to use. I just got the nail polish in the mail not so long ago. I bought it online because you can't really get it here in sweden. But the brand is Nicole By OPI and it's from their Kardashian collection and it's a really barbie pink color. So I started painting my nails with this polish without having an actual plan about what I was suppose to do. Which was such a smart move from my side, or not. But in the end I decided I would do some kind of herringbone design, and it turned out pretty good if I can say so myself.

Herringbone Nails by Elins Nails

I started painting all the lines with a striping brush. My pinky didn't turn out that great, but I have to live with that. I added on white nail with pink lines instead like an accent nail. 

Herringbone Nail Art by Elins Nails

I added some glitter and some mini herringbones in the design and voila - this was the results of that. 

The nail polishes I used in this design was - 


Don't forget the important base coat when you paint your nails.
Pink - Nicole By OPI - All Kendall-ed Up
White - OPI - Alpine Snow
Glitter - Nails Inc - Abbey Road
Top Coat - Seche Vite


Please leave me a comment below, tell me what you think of the design, if you got a design you want me to do or if you simply just wanna say hey. I appreciate every single comment! 


08 March, 2013

A Fabulous French Manicure - Glitter

The design I'm gonna show you today I made for a friend last year for new years eve. Wanted to show you these because there is much you can do with the classical french manicure. Only the fantasy will stop you. It don't have to be the typical white tip french manicure you can use whatever color you want or glitter if you want that.

This design I did with the nail polish brush. It's a glitter french manicure to fit with the new years eve theme. Loads of coats, but it was worth it.

Glitter French Manicure by Elins Nails

Easy but the result says - FABULOUS! Sorry, it was the only word I could came up with to describe this. This is just one of many ways to do a french manicure, like I said before only your fantasy will stop you.

Please leave a comment, just say hey or something. All comments are so welcome. 

31 January, 2013

Striped Valentines Day Nails

Tomorrow is February 1st which means it's 2 weeks left for Valentines Day. So I thought I would start doing Valentines Day design to inspire you so maybe you can find something to wear on Valentines Day.

So here is the first design of my Valentines Day designs.

Striped Valentines Day Nails by Elins Nails

To do this design I started with a light pink shade as my base. Then with a striping brush I did stripes on the nails in 3 different pink shades. Then with a dotting tool I made red hearts over the nails, and even added some red glitter nail polish over the hearts. 

It was a pretty easy design, you doesn't need that much experience to do this. 

The nail polishes I used is these - 


Don't forget base coat to protect your nails. 
Pink - Ciaté - Cutie Pie
Pink - H&M - City 
Pink - OPI - Pompeii Purple
Pink - Gina Tricot - Candyfloss


Red - Claudia - All Red
Red Glitter - Ciaté - Enchanted Rose
Top Coat - Seche Vite

I hope you like this design and that you look forward to the next Valentines Day design.